Posts

Why I Started This Blog

Image
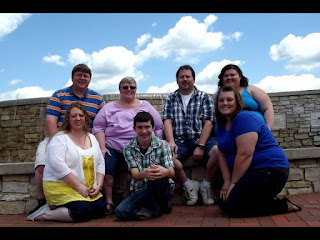
Back in August of 2014 I had the idea to start this blog as a way to share recipes, memories, and much more with family near and far and with others who may enjoy some of the same things I do.  The point of these posts is to share with you what I know and love. I want to share with you recipes and ideas that you and your family may love. These posts will also be here for years to come (hopefully). They will be here for my younger cousins to read and have stories of our family. If I ever have kids of my own, these posts will be here for them to read. Not only is this blog for me to share with you, but it is also a place for me to keep memories.  I also want you to know that I think cooking, makeup, crafts, etc are all put together through trail and error; just like life. What works for me may not work for you and that is completely fine. Everything you do in life should represent you.  I guess what I'm trying to say is take what you learn from the tutorials and ...

Triple Bun Pull Back

Image
The Triple Bun Pull Back is a simple hairstyle that is easy to do and keeps your hair out of your face all day. It can be worn as an every day hairstyle or for special occasions. For this hairstyle, you will need small hair ties, bobby pins, a comb, and hairspray. To begin the hairstyle, divide your hair into three sections on the back of your head and secure them with the small hair ties. The top and bottom sections should be secured close to the part line and the middle section should be secured in the middle.  Once your hair is secure, carefully loosen your hair to cover any part lines that may be showing. Starting with the top section of hair, use the comb to lightly tease the hair closely to the hair tie to create more volume when you create the messy bun.  Twist the hair of the top section to create the messy bun and secure it with bobby pins. Repeat these steps on the bottom two sections. Once your done with the messy buns, f...

Summer Memories...

Image
The other day, I was going through my timehop app when this appeared.  This post took me back to what was one of my greatest summers ever. I remember this trip like it was just yesterday; not six years ago. It was the summer between my Sophomore and Junior years of high school and I had spent half of it with my grandparents.  They had come up at the beginning of July for my cousins birthday and a few days later, we set out for a month of making memories.  The trip was filled with shopping, camping, boating, learning new things, but most importantly it was full of quality time I got to spend with them and other members of my wonderful family.  That summer was also full of many firsts for me.  First time camping at Lake Shelbyville. First time boating with my family. First time driving my grandparents car. ~This was a big deal because I was the first grandchild that was allowed to drive their car.~ First time sailing. But most...

Everyday Bronze Smokey Eye: Drugstore Products

Image
Makeup is a fun and easy way to not only express yourself but also a way to highlight a persons natural beauty. This smokey eye is an easy way to enhance any eye color. I also feel that you don't need to use the same expensive makeup that some people use to achieve the same look. There are many affordable drugstore products that can be used to create any look that a you want. I wasn't completely sure how to write the process of this look into a blog post so to make it easier to understand, I made a video of I did it.

4th of July Cupcakes

Image
The 4th of July brings fireworks, fun outside, camping, and cookouts. What would a cookout be with out a yummy dessert. This year for our family cookout I've decided to make Red, White, and Blue cupcakes.  For my cupcakes and frosting I used: Boxed White Cake Mix Red and Blue Food Coloring For the frosting I used: 2 cups Heavy Whipping Cream 1/8 cup Powder Sugar 2 drops of Orange Extract (or flavor of your choice) Directions: Cake Make the cake mix according to its directions. Evenly separate the cake mix into three parts. In one bowl add red food coloring and in another add blue food coloring until you get the color you desire. The third bowl will be left white. Layer the colors into the muffin tins until each is about 3/4 full. Bake according the the backing time and temperature on the cake mix. Once done, let them cool before you frost them. Frosting Before you make the frosting it is important that you free...

Happy Father's Day!

Image
Happy Father's Day Dad! From a little girl to today, you have taught me many life lessons that I will carry with me for the rest of my life. You taught me that things will not always go the way that I want them, but that is O.K. because you have to be able to work with you have.  You have always been there when I have needed you and have showed me how a man should treat not only a woman but everyone around.  You have taught me to love and care for others and to treat them the way I want to be treated.  You have taught me to not be afraid and to try new things.  You have taught me to use my voice and to stand up for myself.  Most importantly, you have taught us all to be who we are no matter what happens in life.  Happy Father's Day! I Love You!

Easy Headband Updo

Image
Being a full time college student and working, finding time to do my hair every morning can be difficult. Most days I just end up putting my hair into ponytail and calling it done. Other days, I will actually take the time to do my hair. My favorite go to hair style is an easy way to keep my hair pulled back but still looking cute.  For this hairstyle you will need a headband and some bobby pins. To start, make a part starting at your hair line, about an inch long. This part can be in the middle or off to one side. It depends on what you prefer. Place the headband on top of all your hair. Putting the headband on this way makes twisting the hair easier. At this point I like to take a few bobby pins to pin the band to my hair to make sure it stays in place all day.  Starting closest to your face, twist the hair back and tuck it underneath the band. Do this on both sides until the twists meet at the back of your head.  Then fold up and tuck the rem...